IDEA下搭建并部署一个Servlet程序
1.新建一个Servlet项目
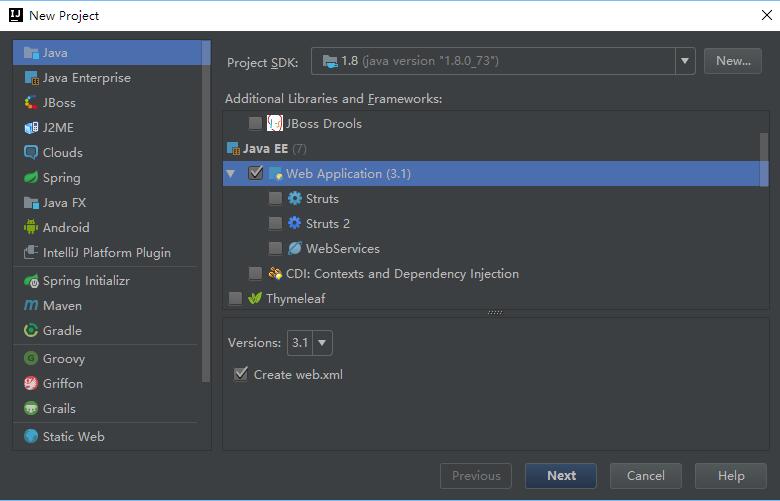
点击File -> New -> Project...然后选择WebApplication,如下图:
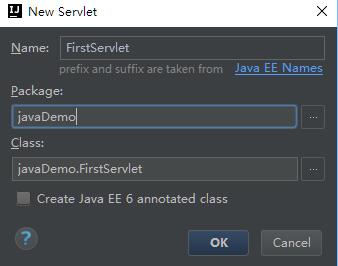
新建完毕之后,在ServletDemo目录下右击src -> New -> Servlet,新建Servlet文件,如下图:
2.添加Servlet-api.jar
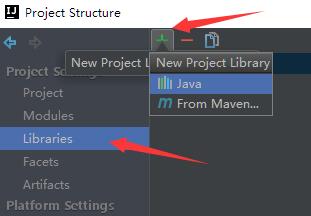
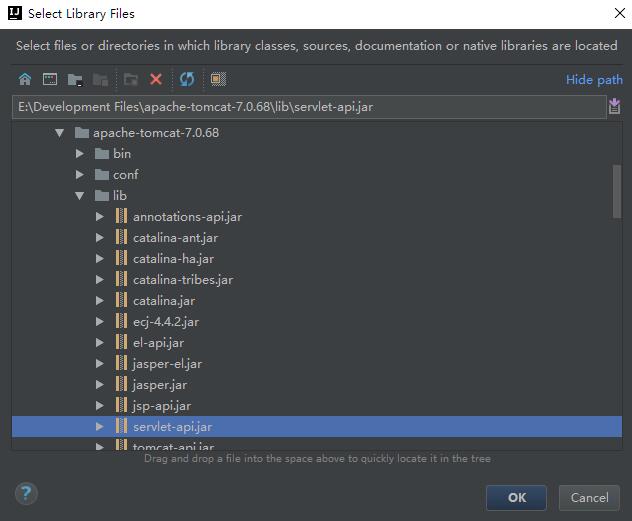
接着需要添加Servlet-api.jar库,点击File -> Project Structure (快捷键:Ctrl + Shift + Alt + S),在弹出窗口的左侧Project Settings选择Libraries,添加你的tomcat根目录/lib/servlet-api.jar,如下图:
3.配置文件路径
在web/WEB-INF下创建两个文件夹:classes和lib,classes用来存放编译后输出的class文件,lib用于存放第三方jar包。
配置文件夹路径
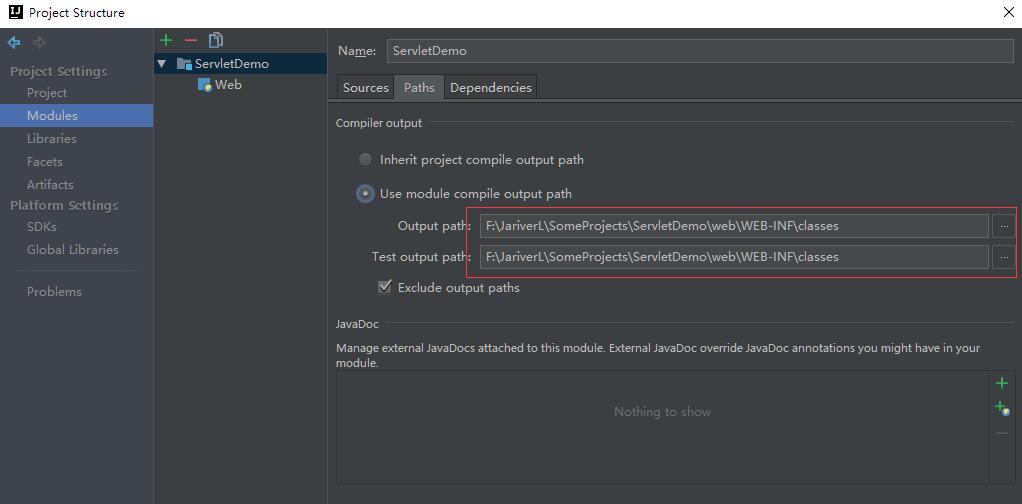
File -> Project Structure (快捷键:Ctrl + Shift + Alt + S) -> 选择Module -> 选择 Paths -> 选择”Use module compile output path” -> 将Output path和Test output path都选择刚刚创建的classes文件夹。
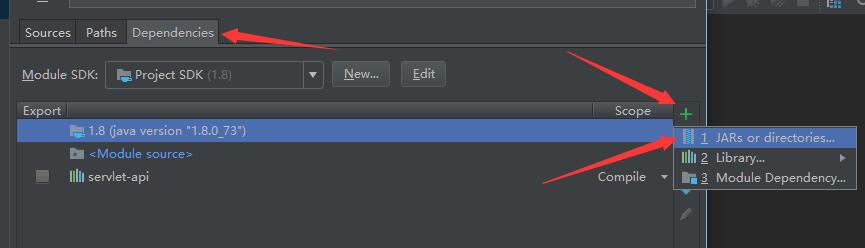
接着选择Dependencies -> 点击右边的“+”号 -> 选择1 “Jars or Directories”
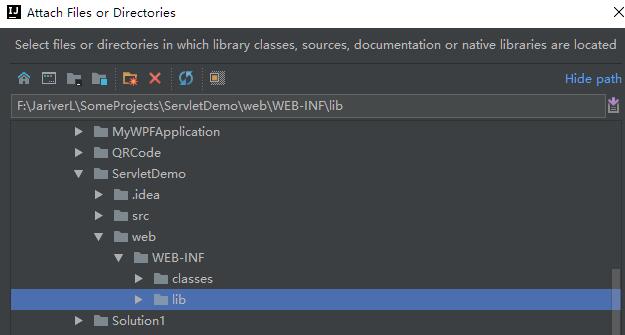
-> 选择刚刚创建的lib文件夹
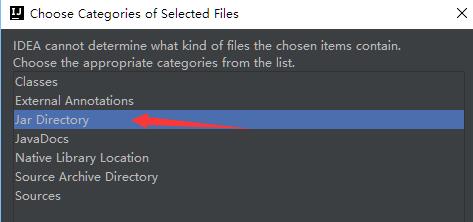
-> 选择“jar directory”,然后就ok就可以了
4.配置Tomcat容器
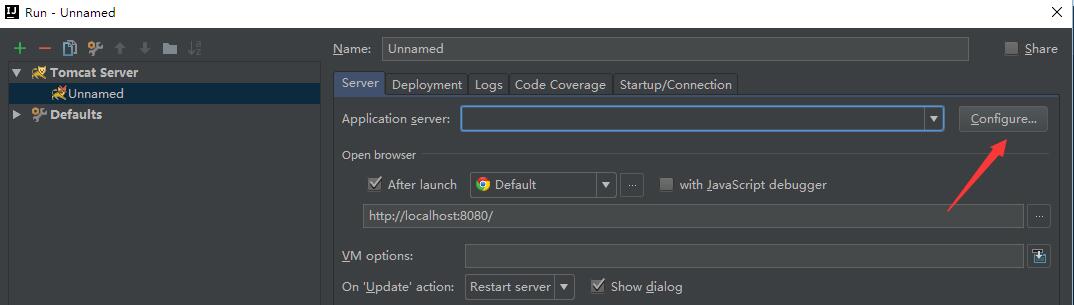
打开菜单Run -> 选择Edit Configuration,再点击“+”号 -> 选择“Tomcat Server” -> 选择“Local”
点击”Application server”后面的”Configure…”,弹出窗口中选择本地安装的Tomcat目录,然后OK
在Server选项板中,取消勾选After launch,点击OK。

在Deployment选项板中,点击右边的“+”号,选择Artifact。
至此Tomcat配置完成,我们可以通过localhost:8080访问到index.jsp
5.编写Servlet代码并编译运行
1
2
3
4
5
6
7
8
9
10
11
12
13
14
15
16
17
18
19
20
21
22
public class FirstServlet extends javax.servlet.http.HttpServlet {
private String message;
public void init() throws ServletException{
//初始化message
message="Hello World!";
}
protected void doPost(HttpServletRequest request, HttpServletResponse response) throws ServletException, IOException {
}
protected void doGet(HttpServletRequest request, HttpServletResponse response) throws ServletException, IOException {
//设置响应内容类型
response.setContentType("text/html");
//初始化PrintWriter,输出message
PrintWriter out=response.getWriter();
out.println("<h1>"+message+"</h1>");
}
}
接下来要编写web.xml配置文件,我们发现idea已经在web.xml中写好<servlet>的配置,我们需要增加<servlet-mapping>配置,完成的配置文件如下:
1
2
3
4
5
6
7
8
9
10
11
12
13
14
<?xml version="1.0" encoding="UTF-8"?>
<web-app xmlns="http://xmlns.jcp.org/xml/ns/javaee"
xmlns:xsi="http://www.w3.org/2001/XMLSchema-instance"
xsi:schemaLocation="http://xmlns.jcp.org/xml/ns/javaee http://xmlns.jcp.org/xml/ns/javaee/web-app_3_1.xsd"
version="3.1">
<servlet>
<servlet-name>FirstServlet</servlet-name>
<servlet-class>javaDemo.FirstServlet</servlet-class>
</servlet>
<servlet-mapping>
<servlet-name>FirstServlet</servlet-name>
<url-pattern>/demo</url-pattern>
</servlet-mapping>
</web-app>
编译(Run)后会发现在classes目录下生成了HelloWorld.class文件,我们在Tomcat运行时可以通过localhost:8080/demo,以Get的方式访问这个Servlet。
